
How
I built the 12 inch scope
Before
painting
|
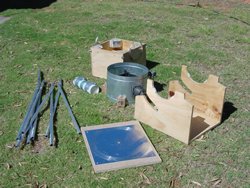
Getting ready for the first viewing. Here it is in transportation form. It fits easily into a sedan. Notice the P.V.C tube with tape around it; this is the counter weight of 12kgs. |
 |
|
I
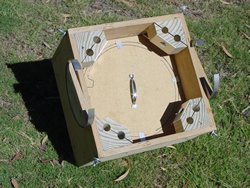
made a dust cover as a bit more protection for the mirror surface. I
have also adopted using clamps to hold the poles for the secondary cage.
|
 |
|
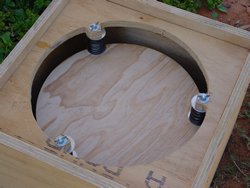
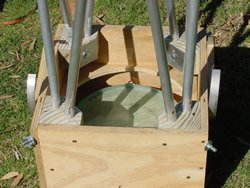
To
support the mirror cell I used 1/4 inch bolts with valve springs. This
makes it very easy to collimate each time I take it out.
|
 |
|
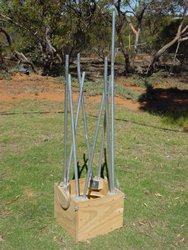
First
stage is to put the poles in place. The longer one is used as a handle,
but I will chop it down a bit further.
|
 |
|
This
is a better view of the clamps. I use a wing nut to adjust the clamp.
I wanted to avoid using tools in assembling the scope as I am gifted
in loosing tools, nuts & bolts in daylight imagine at night!
|
 |
|
It's
starting to look like a telescope now. Again I have used wing nut clamps
to hold the secondary cage.
|
 |
|
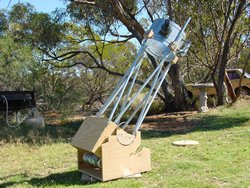
Fully
assembled. It takes about 5 min to put together and by my self about
10 min to collimate it. Notice the counter weight in place at the rear
base. I have since melted all the lead into a 12kg sheet, which slides
in place.
|
 |
|
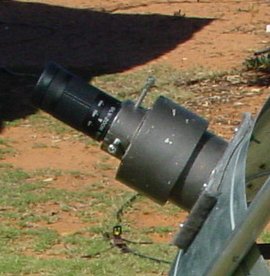
I
am using a helical focuser with a Vixen zoom eyepiece. A helical focuser
is good for a single focus eyepiece, but a zoom is easier to use on
a rack and pinion focuser. The Vixen LV-Zoom 8mm-24mm is an excellent
eyepiece to use. Again another gift is also dropping things, and when
fumbling in the dark for eyepieces, well there is a good chance of it
ending up on the ground. With the Zoom, there is really no chance of
that.
|
 |
|
|